If your child is working with a speech-language pathologist on articulation, you already know the drill. Therapy once or twice a week, a homework sheet tucked in the folder, and then… you try your best at home. You sit down together, you do the words, you think it went fine, and then you’re never quite sure if your kid was actually saying the sound right or just saying it fast enough that you couldn’t tell.
That was us. And then I discovered that a cheap little voice recorder changed our whole home practice routine. Is it ugly? Yes. Is it cheap and functional? Also yes.
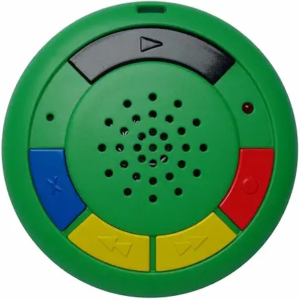
I’m talking about this one: the Talking Products Multi Memo Voice Recorder. It’s simple, portable, and has about six minutes of recording time. No apps. No Bluetooth to set up. No screen to get distracted by. You press a button, you talk, you press a button again, and you hear yourself back. That’s it.
For a kid working on articulation? That simplicity is exactly the point.
SIDEBAR: Could you do this with your phone? Absolutely. And maybe your kid can handle that, but if I hand mine my phone, he turns feral and immediately wants to click around to other things or take pictures, etc. A single use tool works 100% better for my kiddo. You go with what works for you!
Why Hearing Yourself Back Is Such a Big Deal
Speech-language pathologists have a term for what we’re going for here: self-monitoring. It’s the ability for a child to notice, in real time (or close to it), whether they produced a sound correctly or not.
The team at Speech and Language Kids explains it this way: if a child is not aware that they are doing something incorrectly, it is very difficult for them to fix it. Children have to develop a level of self-awareness before they are able to monitor and change their behavior.
That’s where the recorder comes in. When your kid hears their own voice played back, something clicks. They stop relying on you to tell them “good job” or “try again.” They start to hear the difference themselves. And building that internal awareness is what actually helps the skill carry over into everyday speech, not just during practice drills.
The Dabbling Speechie and other SLPs have noted that audio recordings are one of the most accessible tools for building this kind of self-awareness at home, precisely because they remove the pressure of performing for a parent or therapist. Your kid gets to be both the speaker and the judge.
Fun Activities to Try at Home
The key thing to understand is that you are not running a therapy session. You are creating a low-stakes, kind of silly, kind of fun game where your kid gets to hear themselves. The activities below are designed to feel like play (or at least not feel like homework).
1. The Self-Grade Read-Aloud
Have your child pick a short book, a few sentences from a school reader, or even just a list of words from their speech folder. They record themselves reading it out loud. Then they play it back and give themselves a grade, like a thumbs up or thumbs down on each sentence, or a score out of five stars.
You stay out of the judging. Let them evaluate themselves. Ask questions like “Did that one sound the way you wanted it to?” or “What would you change if you did it again?” This hands the ownership over to them, which is exactly what SLPs are going for with carryover practice.
2. The Reporter Game
Your child is a news reporter, a sports announcer, or a nature documentary narrator (think David Attenborough explaining what your dog is doing on the couch). They have to speak clearly and professionally into the “microphone” (the recorder) and then play back their report.
This one works especially well for kids who get bored with drills, because they are so focused on the performance that they are not thinking about the pressure of the sounds. Sneak in a few target words by suggesting the topic. “Report on what we had for dinner tonight” can be engineered to include plenty of r-sounds if dinner was spaghetti with red sauce and garlic bread.
3. Read to a Stuffed Animal Audience
Set up a row of stuffed animals. Your child’s job is to read a story or tell a story out loud to the audience, recording the whole thing. Then they play it back and the stuffed animals “react.” (You can have a little fun with this.) Afterward, ask your child to listen again and circle any spots they want to redo. Then they re-record just those parts.
This natural editing process is actually a really sophisticated self-monitoring skill. It does not feel that way when you are doing it with a frog stuffed animal, which is why it works.
4. The Interview Show
You are the interviewer. You ask your child questions and they answer into the recorder like they are being interviewed on a podcast or TV show. Play it back together and react to it the way you would react to watching a fun video. Keep it light. The goal is for them to get comfortable hearing their own voice and naturally tuning in to how their sounds are coming out.
You can make this more targeted by steering interview questions toward words that include their practice sounds. “What is your favorite thing to do on a rainy day?” works great for an r-sound kid.
5. The Before and After Challenge
Record your child saying their target words or a target sentence at the start of a week. Put the recording away. At the end of the week, record the same words again. Play both back to back. Let your child tell you what they notice.
This one is powerful because kids often cannot see their own progress when they are in the middle of it. Hearing “week one you” versus “week four you” is motivating in a way that a sticker chart just cannot replicate.
A Few Tips to Make It Work
Keep sessions short. Five to ten minutes of focused recording practice is plenty, and it is more than enough to build the habit over time.
Do not correct in the moment. Let the recording be the feedback tool. If your child plays something back and cringes, that is the process working. You do not need to add a correction on top of it.
Let them be in charge of the recorder. Kids who feel ownership over the tool are more likely to actually use it. Let your child press the buttons, rewind, and replay as many times as they want.
Celebrate the noticing, not just the correct productions. If your child listens back and says “I said that wrong,” that is a win. That awareness is the whole point.
The Recorder We Use
The Talking Products Multi Memo Voice Recorder is the one I keep coming back to for this. It is not fancy, and that is the point. No touchscreens, no connectivity issues, no five-step setup. You record, you play back, and you are done. It has about six minutes of recording time, which is plenty for a home practice session. It is also small enough that your kid can hold it comfortably, which matters more than you would think when you are trying to get them to use it independently.
It was originally designed as a memory aid and for speaking and listening activities, so it is sturdy and genuinely simple to use. My kind of tool.
The Bottom Line
Speech practice at home does not have to be a battle of wills between you and a worksheet. A voice recorder gives your child something concrete to react to, and it quietly builds the self-awareness that speech-language pathologists say is the real foundation of lasting progress.
Give it a try for one week. Start with the reporter game or the read-aloud grade. See what happens when your kid hears themselves and gets to be the judge.
This post contains affiliate links. If you purchase through my links, I may earn a small commission at no extra cost to you. See my Affiliate Disclosure for details.
Looking for more tools that actually make home practice easier? Check out My Favorite Homeschool Tools for everything I use and recommend.